Work smarter not harder – the TOP 3 functional exercises

TOP 3 FUNCTIONAL EXERCISES 

Functional exercises are designed to improve your mobility, stability, and agility to perform activities and tasks. There are many functional exercises out there. Now that you are working from home, many of you sit down more than ever. Prior to COVID-19, on average people sit more than 70% of the day, and I suspect this percentage will only increase.

To combat sitting for too long, I have picked my top 3 functional exercises to set a strong foundation for you to smash your fitness and movement goals, but also improve your quality of life. The best part is that it is simple, little to no equipment needed, and not time-consuming.

These three exercises are a breakdown of complex movements designed to be strategically progressed and tailored to your fitness and movement goals. Overall, the aim is to build a strong foundation through core stability, on top of optimising your joint mobility and improving your strength and conditioning. The best part of these functional exercises is that these movements have infinite movement progressions. 

Number 1 – Renegade Rows

Renegade rows are a multi-purpose dynamic movement. They are designed to improve midline/core stability, as well as unilateral (one sided) upper back strength and stability. 

The primary key muscular regions involved in this movement are:

  • Upper back

  • Core 

  • Arms

*Training tip: Keep the core strong to limit the torso from twisting

Number 2 – Crawls

Crawls are a foundational movement. It is a moving plank. It works out your core muscles just like a plank, but since you are moving it incorporates shoulder and hip mobility and stability. 

The primary key muscular regions involved in this movement are:

  • Core

  • Legs

  • Shoulders

*Training tip: Attempt going forwards, sideways, backwards or even faster for aerobic conditioning

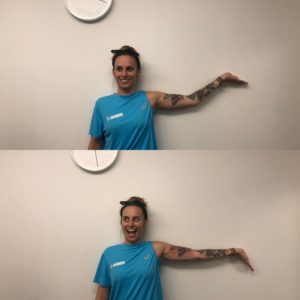
Number 3 – Thoracic Bridge

These are perfect for spine hygiene and maintenance of spinal strength. Spending too much time sitting at your work from home office can lead to bad postures, hunched back and shoulders. This movement reverses to strengthen the upper and lower back, engages the glutes and opens up the chest. 

This is a total body movement.

*Training tip: Keep the feet flat on the floor to optimise the stretch.

Functional exercises are designed to improve your mobility, stability, and agility. It starts off as an easy movement sequence. However, it can be strategically progressed to smash your goals. Stay tuned for part 2! 

What is cupping?

BOSIC Specials

Cupping is an alternative treatment primarily designed to decompress the soft tissue. Unlike many forms of manual therapy such as massage, (trigger point massage) where a compressive force is applied. Cupping does the opposite. 

The cups are applied to certain areas of the body to lift up the skin/fascia to stimulate a decompressive force on the tissue and nervous system to reduce muscular tension, neural tension, improve circulation/blood flow circulation, and/or create body awareness to particular muscles or movement patterns.

In contrast to the widely known bruising circular marks you may have seen on popular athletes such as Michael Phelps, we use cupping for a short amount of time. As a result, you often will not get bruised marks. Unfortunately, sometimes people still experience bruising, but the end result of the treatment is the same. 

In this video we are demonstrating on Kira how to unload and decompress the neural tension in her arm. We are cupping in conjunction with a neural glide to improve her range of motion alongside reducing the tingling/numbness she feels down her left 4th and 5th finger. Below, you can see the results before and after Kira’s cupping treatment. The pain and tingling kept her from fully extending her arm. The release created by the cupping now allows her to move her arm to end range without any pain. 

Can’t fake a smile like that!! Kira is very excited about the increased movement in her arm.

Note: this may not always be the same treatment for everyone. It will depend on a case by case analysis. Please do not attempt by yourself unless you have seen a qualified health professional.

Want to learn more about cupping? If you’d like to book in for a virtual physiotherapy appointment, feel free to call us at 8599 9811 or send us an email at hello@bosic.com.au.

5 Benefits of a Total Body Workout

contact us BOSIC

By Physiotherapist, Vanessa Boon

5 benefits of a total body workout

1.Ideal for home workouts 

Especially during this time, most of us will be doing our workouts from home. The good thing about that is that we do not need much equipment at all! You can modify it and make it harder by increasing your repetitions or add weight (dumbbells, water bottles, books) or make it easier by increasing your rest time.

2. Burn more calories 

Simply, a total body workout burns more calories because you work more muscles. You can think about it like doing many compound exercises in a short amount of time! Plus you can tweak some exercises to make them plyometrics (squats → squat jumps) which will really get you heart pumping and burn those calories! 

3. Decreased time commitments 

Split training sessions can take awhile depending on the structure of your program. Not everyone has time for that, but also during quarantine season, not everyone has the set up or access to the weights needed to complete their standard program. If you only have half an hour to spare in a day, a total body workout is perfect for you! 

4. Builds more strength 

You work all the muscle groups in your body or at least all the major muscle groups with a total body workout. A workout that works all your muscles together gives them the endurance and the strength they need to do what you want them to do! Because you do these workouts ideally 3 times or more a week, your muscles are worked more than they would be with regular split training. 

5. Perfect for beginners 

A total body workout is the best way to build total body strength! You can modify your workout to make it as easy or as difficult as you want. You can also focus on specific areas that are weaker than others to make sure no part is lacking in strength. Check out this video to learn three exercises that are effective for a total body workout! 


During this time of isolation it is important to keep moving. There is no better and safer way than total body workouts! We do a free workout on our instagram live (@barangarooclinic) most days of the week or if you would prefer a more specific program tailored to you, book in with us or give us a call at 8599 9811 and let’s start planning!

Can’t get to the gym? Get creative!

By Physiotherapist, Paulina Backiel

DIY: At-home Gym Equipment

Back when I was a full-time international postgraduate student, there was no way I was able to afford rent, transit, uni fees AND manage to pay for a gym membership. So, I got creative and built my own gym!! In this blog, I am going to outline the steps I used, so that you can create your own gym, too.

Materials:

  1. Canned goods and rice (anyone else reminiscing about those 5 star uni dinners?)
  2. Coles/woolies bags, old purses 
  3. Backpack
  4. Staircase or solid/sturdy chair
  5. Sturdy chair or couch (not too soft)
  6. Milk cartons or soft drink/water bottles (500ml, 1L, 2L, 3L)

So how do we make weights/gym equipment using our supplies?

Kettlebells

-use the Cole’s bags or purses/small bags and fill them with heavy items such as canned foods or bags of rice

Exercise example: walking lunges holding heavy bags at side

Weighted vest

-fill backpack with heavy items such as canned foods or rice bags

Exercise example: Weighted squats with backpack on backwards (heavy side on chest, unless you want to do a back squat then on back)

Stairs or box at gym

-staircase or sturdy chair

-can hold 2 milk jugs in either hand to add weight

Exercise example: step ups with or without holding weight

More Dumbbells and Kettlebell ideas

-fill up old milk cartons (3L=3kg, 1L=1kg, etc.)

Exercise example: bicep curls holding 2L full milk carton

Bench

-Couch or solid chair

-again can use weight with either weighted backpack vest you made or holding heavy object

Exercise example: sit to stand from chair or couch (soft couches will be harder so just tap couch with bum)


So there you guys have it!! Heaps of amazing things that you can find at home and create your own gym!! Just remember a can of beans is 400g = 0.4kg, 500ml bottle of water = 0.5kg.

Have fun training!!!


SLAP tears – what are they and what can you do if you have one?

exercise physiology BOSIC


A SLAP tear is an injury to the cartilage of the shoulder joint called the labrum.  The labrum is a ring of cartilage surrounding the socket of the shoulder joint. The humerus/arm bone forms the ball aspect of the shoulder joint. Together they form a ball and socket joint. 

There are actually many types of labral tears, but the specific type of labral tear we are discussing today is the SLAP tear. SLAP stands for Superior Labrum from Anterior to Posterior, and is a fancy way to say that the cartilage at the top of the shoulder has been injured. The SLAP tear occurs at the point where the bicep tendon inserts onto the labrum, and you can see from the diagram below exactly where the injury occurs.


We do not owns the right to this image. Image retrieved from the American Academy of Orthopaedic Surgeons.


So, what do you do if you have a SLAP tear?

Some SLAP tears does not require surgical intervention and some do. Rehabilitation depends on the severity/size, level of discomfort and, if required, the strength of the repair and surgical protocols.


A typical guideline involves: 

  1. Immobilisation

  2. Restore range of motion

  3. Regain Strength

  4. Plyometric/Dynamic Movements


Here are some tips to avoid/minimise a SLAP tear:

Due to shoulder joint having a lot of mobility, it also requires more stability. Here are a few exercises that will help to strengthen the small, stabilizing muscles of the shoulder joint. 

Posterior Cuff Strengthening/Face Pulls

  • Start with your arm straight down at your side and the thumb pointing forwards.

  • Raise your arm forwards and up/above your head keeping the elbow straight.

  • Make sure you do not hunch your shoulders as you lift the arm against the resistance.

  • Control the movement bringing it down by your side, slowly bring it back to the start position and repeat.


Banded Pushups

  • Start position in a press up position with the band around your wrist, arms directly under the shoulders, fingers facing forwards. The back and trunk level and straight with the toes on the floor.

  • Lower the body using the arms and shoulders until the chest just touches the floor, keep the trunk straight and arms aligned with the shoulders.

  • Press up into the start position using the arms and shoulders only, keep the backside in line with the back and shoulders and do not arch the lower back.


Diagonal Y- Raise

  • Start with your arm straight down at your side and the thumb pointing forwards.

  • Raise your arm forwards and across, keeping the elbow straight.

  • Make sure you do not hunch your shoulders as you lift the arm against the resistance.

  • Control the movement back down to the starting position and repeat.


For more information, email us at hello@bosic.com.au or give us a call at 8599 9811. We would be happy to answer any questions and help you recover!